Pages

Friday, March 7, 2014

Dynamic Tabs UI Shell Template Example

The UI Shell is a page template containing default information, such as a logo, menus and facets. To supplement the UI Shell template, there also is a UIShellMainArea template. Because you can load information into dynamic tabs, the Main area cannot be a part of the page itself since it is loaded dynamically.

I create a sample modal package based on the Hr - Employee table.

Then created a simple Taskflows Employee List, Departments List and Location List.

In the Test page Drag and drop Template Component from the component pallet.


Then select the Oracle Dynamic Tabs Shell Template from the Templates List.


Sample Code
            <af:pageTemplate viewId="/oracle/ui/pattern/dynamicShell/dynamicTabShell.jspx" value="#{bindings.ptb1}"
                             id="pt1">
                <f:facet name="copyright"/>
                <f:facet name="about"/>
                <f:facet name="navigation"/>
                <f:facet name="globalLinks"/>
                <f:facet name="status"/>
                <f:facet name="globalToolbar"/>
                <f:facet name="globalSearch"/>
                <f:facet name="globalTabs"/>
                <f:facet name="welcome"/>
                <f:facet name="innerToolbar"/>
            </af:pageTemplate>

Using these facets you can customize this template.

Drag and drop all you TaskFlow links in the Navigation section and create two attributes for Name and location of Flow.


In the Bean take these attribute values and create a dynamic tab.


Sample UI.


You can download the sample code.


Wednesday, February 26, 2014

How to Filter ADF Select Many Shuttle Component

In this post i am going to explain how to filter a shuttle component. We can implement this technique to filter other components.

The selectManyShuttle provides a mechanism for selecting multiple values from a list of values by allowing the user to move items between two lists. But if your selection list is big then it is difficult to find out the values. So in this blog i will explain how to filter the shuttle.


I create a sample modal package based on the Hr - Employee table.


Wrote a simple application module method to filter the employees.


Created a simple page page, then go to bindings and create a list binding four your employee view object.

Go to bindings -> Click on the Add button under bindings section and select the "List" binding.


Then select list binding type to "Standalone select multiple value list".


Then select the Base data source, Base attribute and Display attribute.


Then go to the design view and drop the shuttle component from the components pallet. Then provide the Binding which you created just now #{bindings.<Your List Name>.items}.


Then created a input text box to get the search string and provided a client listener and server listener to handle the key up listener.


Note: All these shuttle or any Multi select components will maintain different index. To clear this index we need to reset the selection list.

All the selected values are passed to the query in the IN clause before filter.

Screen shots.


You can download the sample code.

Wednesday, January 22, 2014

ADF Signature Component(Declarative)

In this post we are building a Signature Declarative Component.

To create a declarative component.

From the main menu, choose File > New. In the New Gallery, expand the General category and select Applications. Then in the Items list, select Custom Application and click OK.


 Provide the name and click Finish.

In the Application Navigator, double-click the project you just created to open the Project Properties dialog. Select JSP Tag Libraries and Distributed libraries, then click Add.  

In the Choose Tag Libraries dialog, select ADF Faces Components 11 and click OK twice to close both dialogs


Click File -> Web Tire-> ADF Declarative component and provide the details.


Click on the JSP XML radio button to create a .jspx file.

Add the Attribute.

                <attribute>
                    <attribute-name>signatureValue</attribute-name>
                    <attribute-class>java.lang.String</attribute-class>
                    <required>true</required>
                </attribute>

Add Tag Library.
Created Css and Js folders to copy the Signature files.


in the signature.jspx file implement your signature code.

After completion of your code, create a deployment profile.

Click on Build-> Deploy -> New Deployment Profile. And then deploy the jar file.

Signature Test Application.

Simple Application with model and View controller project.

Created a simple table to save the signature images and value.

 
 To add your declarative component jar file,

Resource Palette from the main menu to open the Resource Palette. Expand the IDE Connections panel.


From the New dropdown menu, choose New Connection > File System


Point to your Jar location.

Right click on the jar file select -> Add to project.


To add signature component to you page. Click on components palette -> from the drop down select signature component.

Then created test page signaturetest.jsff and add the signature component to page.


Name space and Tag sample.

Created a Bean value and passed to the signature component.

Note: Signature capture is based on the 2d coordinates.

Ex:{"lines":[[[76,51.43],[76,52.43],[77,56.43],[82,66.43],[92,80.43],[106,100.43],[119,119.43],[134,141.43],[148,164.43],[158,178.43],[165,188.43],[172,197.43],[176,204.43],[178,208.43],[178,209.43]]]

Before saving the data to database i am converting this coordinates to image BLOB.
--End Note--

    private static BlobDomain redrawSignature(List<List<Point>> lines) throws Exception {
        BufferedImage signature = new BufferedImage(
                SIGNATURE_WIDTH, SIGNATURE_HEIGHT, BufferedImage.TYPE_BYTE_GRAY);
        Graphics2D g = (Graphics2D)signature.getGraphics();
        g.setColor(Color.WHITE);
        g.fillRect(0, 0, signature.getWidth(), signature.getHeight());
        g.setColor(Color.BLACK);
        g.setStroke(new BasicStroke(2, BasicStroke.CAP_ROUND, BasicStroke.JOIN_ROUND));
        g.setRenderingHint(
                RenderingHints.KEY_ANTIALIASING, RenderingHints.VALUE_ANTIALIAS_ON);
        Point lastPoint = null;
        for (List<Point> line : lines) {
            for (Point point : line) {
                if (lastPoint != null) {
                    g.drawLine(lastPoint.x, lastPoint.y, point.x, point.y);
                }
                lastPoint = point;
            }
            lastPoint = null;
        }
        BlobDomain blob = new BlobDomain();
        OutputStream out = blob.getBinaryOutputStream();
        ImageIO.write(signature, IMAGE_FORMAT, out);
        return blob;
    }


Test Screens.


You can download the Sample Application.


Monday, January 13, 2014

ADF Calendar application with multiple providers


In this post we are going to build an ADF calendar application with multiple providers. A provider can schedule two types of events either a Group event or an Individual Person event.

Also, Provide an ability to filter the calendar events based on provider selection
and Provide an ability to choose different color styles for each provider.

Step 1:

For the building of calendar application we have to create the following 3 new tables in HR Schema.

Table 1: Calendar :  To place all the calendar events
Table 2: Providers : List of providers for calendar
Table 3: Groups :  List of available groups for scheduling events
And  we are using Table 4: Employees (already existing) :  List of persons for scheduling individual events

Script to create the tables -

--Create Calendar Table
CREATE TABLE CALENDAR
(
  ID VARCHAR2(20 CHAR) NOT NULL
, PROVIDER VARCHAR2(100 CHAR) NOT NULL
, START_DATE DATE NOT NULL
, END_DATE DATE NOT NULL
, TITLE VARCHAR2(200 CHAR) NOT NULL
, LOCATION VARCHAR2(200 CHAR) NOT NULL
, EVENT_TYPE VARCHAR2(1 CHAR) NOT NULL
, PERSON_ID VARCHAR2(20 CHAR) 
, GROUP_ID VARCHAR2(20 CHAR)
, ISRECURRING VARCHAR2(20 CHAR) 
, CONSTRAINT CALENDAR_PK PRIMARY KEY
  (
    ID
  )
  ENABLE
);

--Create Calendar Sequence
CREATE SEQUENCE CALENDAR_SEQ
START WITH     1000
INCREMENT BY   1
NOCACHE
NOCYCLE;

-- Create Groups
CREATE TABLE GROUPS
(
  ID VARCHAR2(20 CHAR) NOT NULL
, NAME VARCHAR2(100 CHAR) NOT NULL
, CONSTRAINT GROUPS_PK PRIMARY KEY
  (
    ID
  )
  ENABLE
);

-- Create Providers
CREATE TABLE PROVIDERS
(
  ID VARCHAR2(20 CHAR) NOT NULL
, NAME VARCHAR2(100 CHAR) NOT NULL
, CONSTRAINT PROVIDERS_PK PRIMARY KEY
  (
    ID
  )
  ENABLE
);

Insert the below test data in Providers and Groups tables;
-- Insert test data into providers table
insert into providers values ('101','Provider A');
insert into providers values ('102','Provider B');
insert into providers values ('103','Provider C');


-- Insert test data into Groups table
insert into groups values ('3001','Group A');
insert into groups values ('3002','Group B');
insert into groups values ('3003','Group C');

Step 2:

Build the EO's and VO's based on the Calendar, Provider, Groups and Employees tables.


Steps 3:

Define the three bind variables startDate (Date type), endDate(Date type) and timeZone(String type) on Calendar View Object, without these three transient attributes the adf faces doesn't show the calendar option while dragging and dropping this VO on to the page.

Here the data types of the bind variables are important to recognize the calendar component but not the variable names.


Step 4:

Build the CalendarAM application module and add the view objects to it.


Step 4:

Create the calender.jsff page in CalendarUI project and place the panelSplitter component to divide the screen horizontally. Place all the providers in first panel and calender component in second panel.

Drag and drop the CalendarVO from CalendarAMDataControl to the Calendar.jsff page


Note: Above Calendar in create list only dispalyed if the VO has 2 Date and 1 String bind variables defined on it.

And Select the calendar activities attributes accordingly.


Select and shuffle the required attributes in Calendar Model.


select the providers details and select finish.


After placing the providers in first panel and calender component in second panel code looks like


Implemented all the logic needed to get the providers list and default color for provider in the bean CalendarBean.java file.

To apply for style colors on different providers, activity styles need to be applied on calendar component.


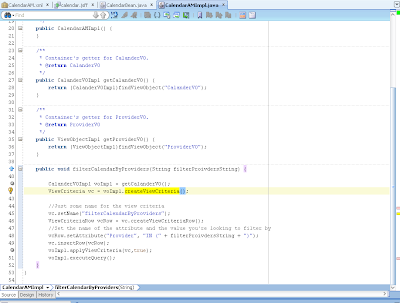
To enable/disable the providers on calendar activities, create a method in CalendarAMimpl.java and apply the programmatic view criteria to include only the selected providers in CalendarVO, Call this method when a provider is enabeld/disabled.


Complete application can be downloaded here. Run the CalenderTest.jspx page to view the Calendar App demo.


The application can be downloaded from here.